
Getting Started with The Quiz Creator
Welcome! Let’s dive into using The Quiz Creator step-by-step, so you can confidently create and launch your quiz in no time. By the end of this guide, you’ll know exactly how to get your quiz up, customized, and ready to capture leads or direct your quiz takers to results pages seamlessly.
Step 1: Choosing How You’ll Deliver Quiz Results
Before anything else, you’ll decide how your quiz delivers results to your takers. This choice is all about the experience you want to give and the goals you have for your quiz. Here’s a quick breakdown of each option, along with some examples to help you see them in action.
Option A: Embed Opt-In Forms for Results Delivery
If growing your email list or gathering contact information is a top priority, using opt-in forms to deliver results is a powerful strategy. Here’s how it works:
- How It Works: Create a separate opt-in form for each quiz result using your CRM or email provider. When quiz takers reach the end of your quiz, they’ll see the opt-in form for the result they earned. Once they fill out the form, they receive their result, and you get their contact information.
- Benefits:
- Lead Generation: Every quiz taker becomes a potential lead, so you can follow up with tailored emails or offers.
- Segmentation: Each form connects directly to a specific result, meaning you can segment new contacts based on their results, creating more personalized follow-up.
- Example: Imagine you’re a nutrition coach with a quiz titled, “What’s Your Optimal Diet Type?” You could set up four result forms: Vegan, Paleo, Keto, and Mediterranean. Each opt-in form gives users their specific result and signs them up to receive a few starter tips in their inbox. You now have a segmented email list ready for future marketing.
Option B: Redirect to Result-Specific Landing Pages
If you’d prefer that quiz takers go straight to a custom webpage for their result, the landing page redirect is an ideal option. Here’s what to know:
- How It Works: Create a unique landing page for each result on your website. After finishing the quiz, users are automatically directed to the appropriate page based on their answers.
- Benefits:
- Custom Experience: You can fully control each page’s design and messaging, making the result feel more like a full experience.
- More Content and CTAs: A landing page gives you space to add more details, videos, downloadable guides, or a call-to-action (CTA) to purchase a relevant product.
- Example: Let’s say you’re a financial advisor with a quiz, “What’s Your Financial Planning Style?” Results could be one of four types: Budgeting Guru, Risk Taker, Strategic Investor, or Savings Pro. Each result-specific page can include a short video with advice and an option to book a consultation or download a budget planner.
Choosing between these two options depends on how you want to connect with your audience. Whether you’re gathering contacts with opt-in forms or sending quiz takers to interactive result pages, each approach adds a unique layer to your quiz and sets up your audience for more engagement with your brand.
Step 2: Customizing the Look of Your Quiz
Once you’ve set up your result delivery, it’s time to make your quiz visually appealing and aligned with your brand. Follow these steps to style each part of your quiz:
-
Progress Bar Color
- Simply enter your hex code (just the numbers and letters, no “#” symbol) to choose your progress bar color.
-
Question Text Size
- Adjust the size of the question text to make it easy to read and stand out.
-
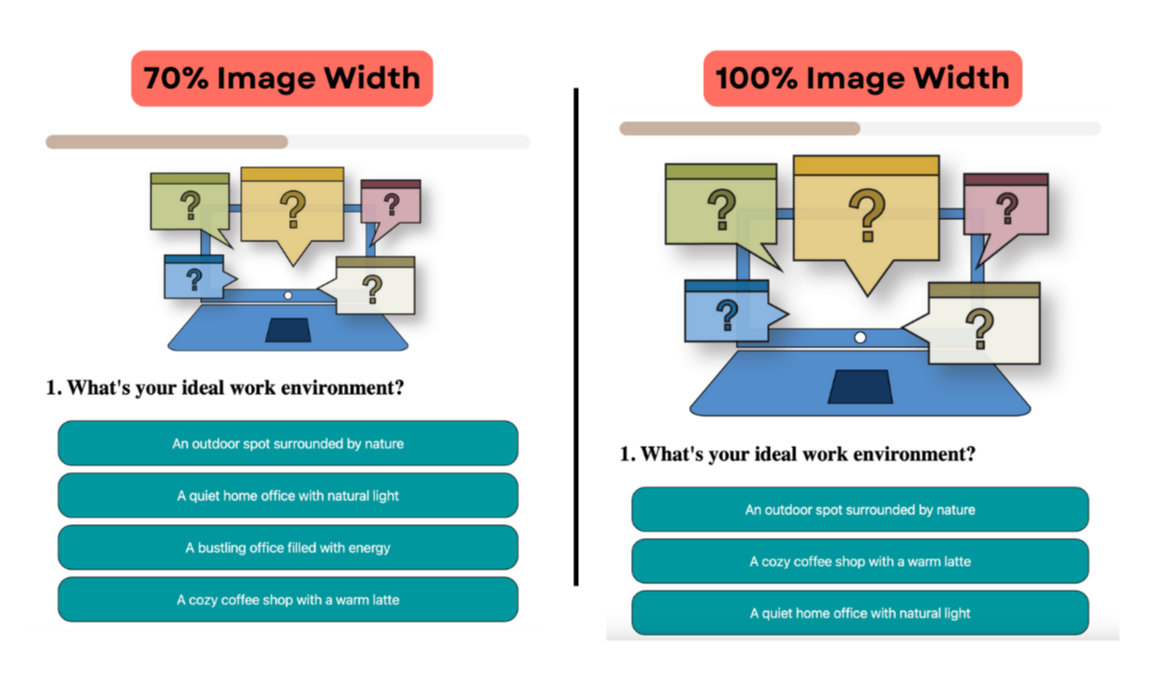
Image Width
- If you’re adding images or GIFs to your questions, control how wide they appear without affecting the image ratio. Choose 100% for full-width images or scale it down if you prefer some extra space on each side.
- Shuffle Answers?
- Selecting “Yes” will randomly shuffle answer options each time your quiz loads, which is a great way to avoid answer bias. If you choose “No,” the answers will stay in the same order you typed.
- Answer Button Styling
- You can fully customize your answer buttons to your brand colors:
- Answer Button Color (hex code again)
- Answer Text Color (hex code)
- Answer Button Style: Choose between square, rounded, or in-between.
- Preview: See your answer button customization in real-time with the preview feature.
- You can fully customize your answer buttons to your brand colors:
Step 3: Setting Up Your Results
With your quiz look customized, let’s set up your results so each quiz taker receives the right outcome.
-
Adding Opt-In Embed Codes or Landing Page URLs
- Embed Code Method: Paste the form’s embed code into each input.
- Landing Page URLs: If using landing pages, paste the links directly from your site or grab the URL from the address bar to ensure you have the entire URL.
*Deep Dive* - You actually only need to have the header code in your quiz once. The header code is the same for all your forms. So, another option here is to paste the header code AND the inline code into the first input. Then for your remaining forms, you only need the inline codes.

Step 4: Adding Your Questions and Answers
Time to start building your quiz content! You’ll add your questions, set up possible answers, and assign a result to each one.
-
Adding Images or GIFs
- To include images, upload them to your website site or use a third-party image host. The Quiz Creator doesn't host images. Copy the image URL, then paste it into the question’s image input.
Pro Tip - Right-click an image you've uploaded on your site and select “Copy Image Address” or "Copy Image URL" for the easiest URL access. This works on third party image hosting websites as well.
For a step-by-step series showing how to find an image URL - Click here -
Assigning Results to Answers
- For each question, assign a specific result to each answer using the dropdown. This ensures clicks on each answer contribute to that result.
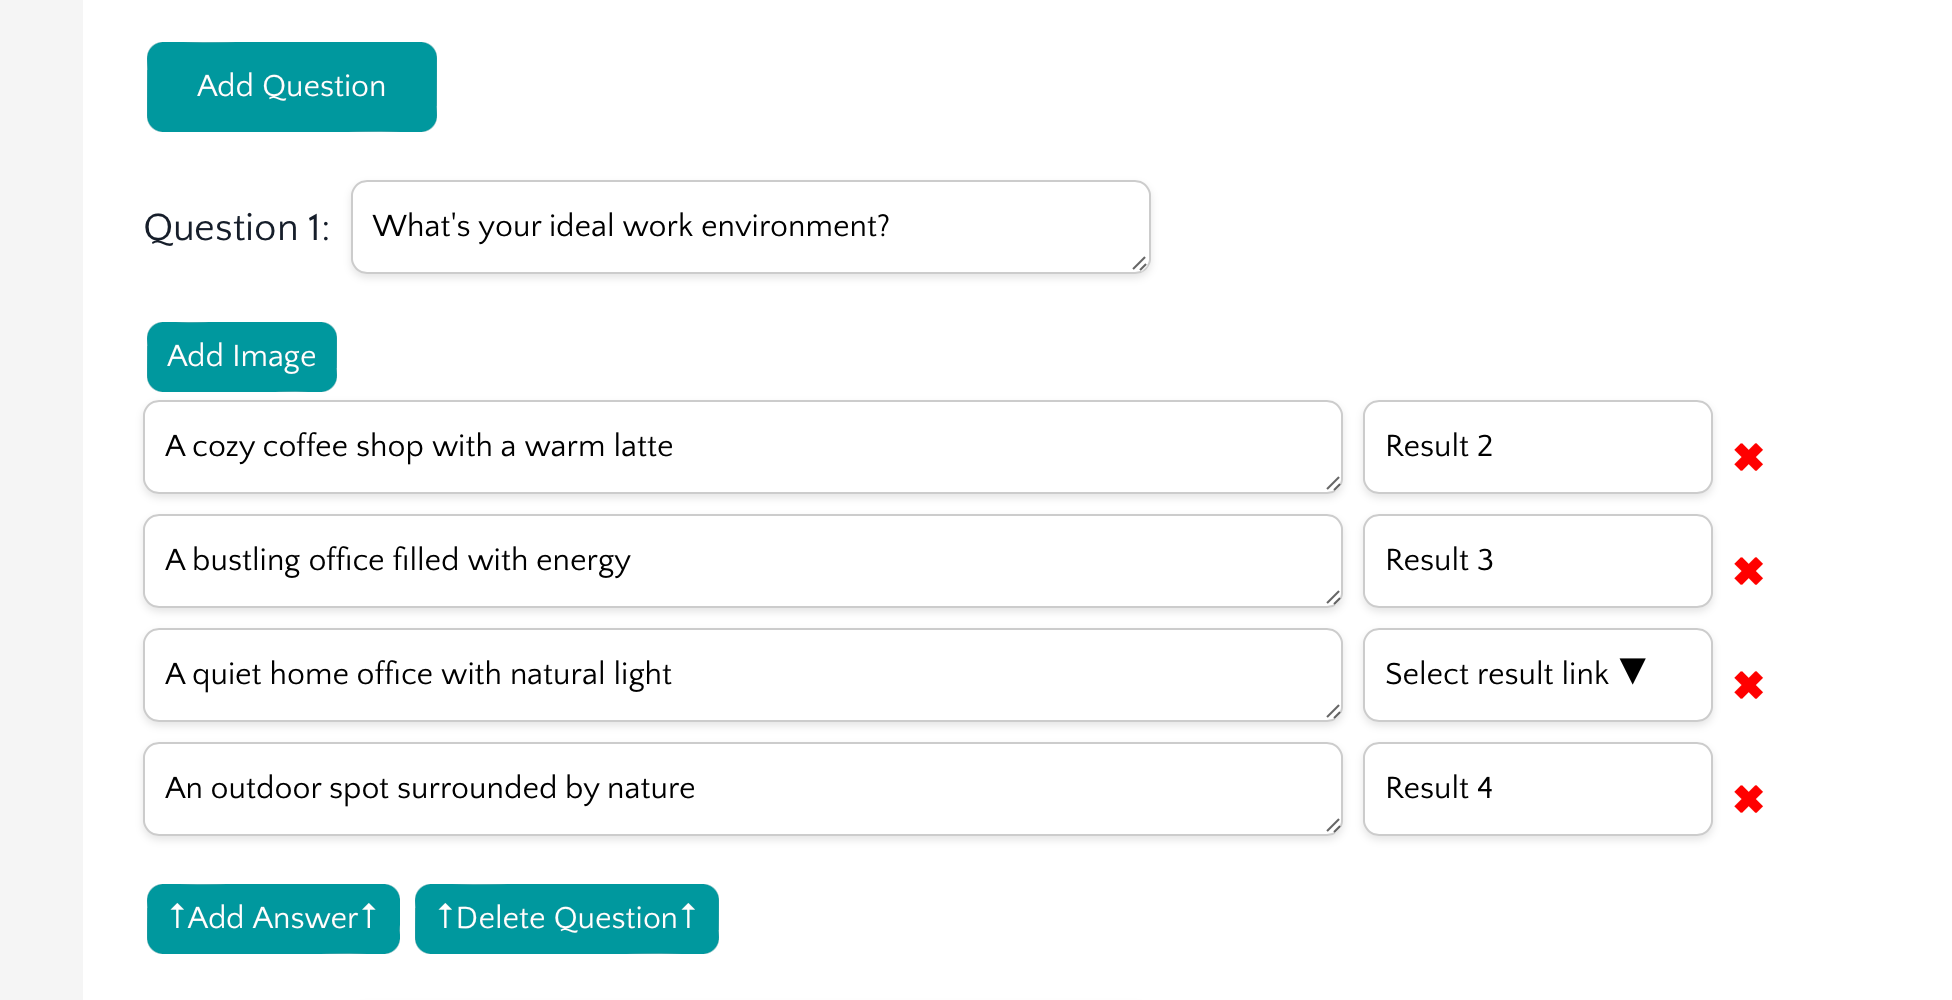
Blank Options: Leave the dropdown blank if you don’t want an answer to impact any result tally.
Step 5: Generating and Embedding Your Quiz
You've finally made it! With all questions and answers set, here’s how to generate and embed your quiz on your website.
-
Create Your Quiz Code
- Click “Create Your Quiz” at the bottom. Your unique quiz code will appear in a box right underneath.
- Copy: Just click “Copy to Clipboard” and you’re ready to go!
-
Embedding on Your Website
- Paste the code into a custom code or custom HTML block on your website. Just copy and paste, and your quiz is live!
- Preview and Test Your Quiz
- Each time you click the "Create Your Quiz" button, your quiz will generate in the preview area under The Quiz Creator. This is a fully functional version of your quiz. Test it out, check for mistakes, and make sure your forms work.
*For the quiz preview, any external websites such as your form's thank you page or the Result Landing Page will open up inside the preview box. This is just the test and in the live version, the quiz taker will be taken to that landing page normally.
- Each time you click the "Create Your Quiz" button, your quiz will generate in the preview area under The Quiz Creator. This is a fully functional version of your quiz. Test it out, check for mistakes, and make sure your forms work.
Step 6: Saving and Editing Your Quiz for Future Use
It’s always a good idea to save your quiz data so you can update or edit it later if needed. Because The Quiz Creator does not host your quizzes, it does not save your data. But you have the ability to save your quiz data for later. This is especially useful if you want to work on your quiz on multiple days without the stress of finishing it in one sitting.
-
Download Your Quiz Data
- After you've entered your quiz information, give your quiz a name and click download. This will download your quiz data as a
.JSONfile. Save this file in a safe spot!
- After you've entered your quiz information, give your quiz a name and click download. This will download your quiz data as a
-
Uploading to Edit
- When ready to make changes, upload your
.JSONfile to repopulate the tool with your saved data. Click "Choose File", select your saved.JSONquiz file and click "Upload Quiz Data" - Updating: Make your changes, then click “Create Your Quiz” to refresh the code, and don’t forget to save again after you’re done making changes.
- When ready to make changes, upload your
For a step-by-step series showing how to use the download/load function - Click here

Now you’re all set!
We hope you’re excited to start using The Quiz Creator to engage your audience and capture valuable leads.
Need further assistance? Feel free to reach out to our support team anytime.
